A long while ago I came into the ownership of a Boswell Giant Bulldog...circa '97...with a broken stem. Good draw, and it had promise. I contacted Boswell's, asking if they could both do a new bit for the pipe and if they would re-do the totally funky 'rustication' which was one of those that tried to form a pattern on the briar...again, which was to my eye totally funky. I wanted the strummel, below the rings to be totally rusticated, with the rings and rim left smooth. They would do a new bit, but wouldn't touch the existing rustication, for whatever reason I don't know.
So I found another stem in my parts bin, but it was too large to fit the shank and not having a lathe I fudged up a way to run a piece of steel down the bore and set it up in my handy dandy DeWalt Compact LiIon drill...using that to turn the stem while I applied a variety of tools and gradually reduced the diameter to the point where it fit well. Thus, the stem issue was solved.
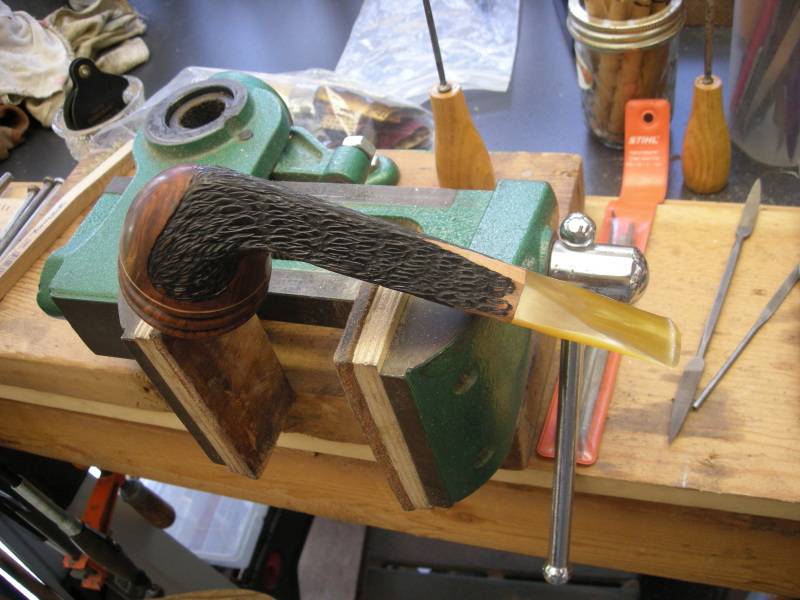
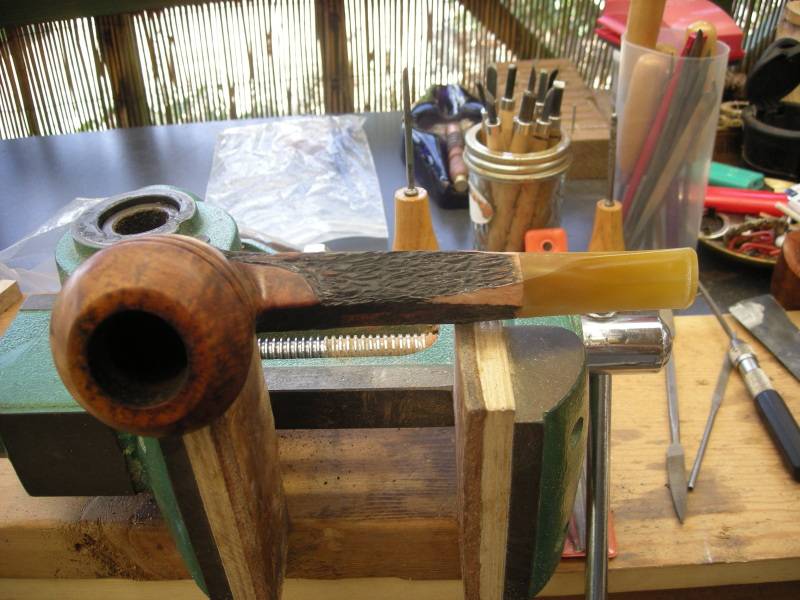
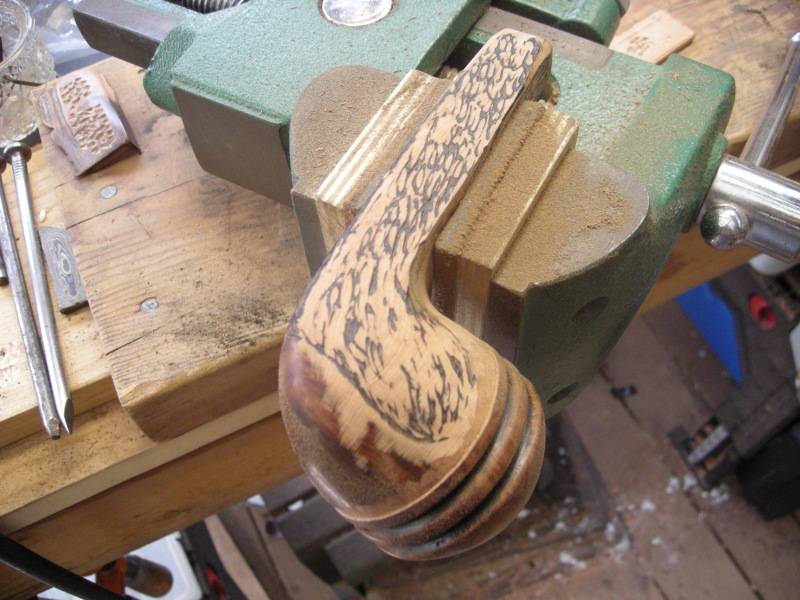
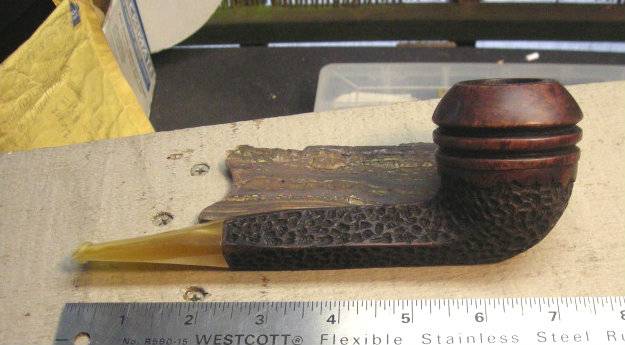
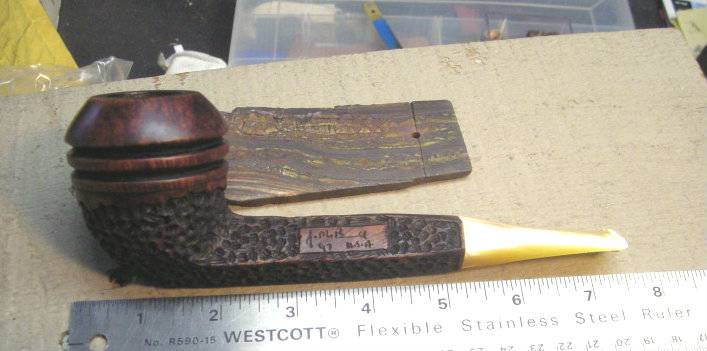
THEN - using my series of Iwasaki Japanese Carving files, and other files and papers, took the existing rustication down almost to a smooth surface and created a sort of 'dripping wax' look under the bottom-most ring, similar to what several of my favorite Italian makers offer...like Radice, for one. I love that look, and since I could do whatever I wanted...that's what I did! Then I went at the body of the strummel with one of my carving tools, a small narrow gouge, creating a surface covered with small deeply incised/indented shapes and finished with a very very fine 'parting' tool to score each of the indents with a series of fine lines, rather like hatchmarks...orienting these at 30, 60 and 90 degrees to each other as I worked along the surface of the strummel. The resulting effect can be seen in the following photos, which also show the original surface and the stage at which I had taken the surface down just prior to rusticating it.
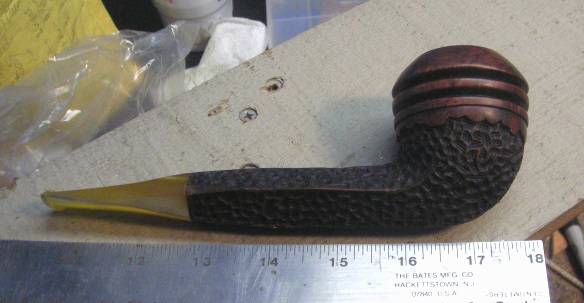
The re-staining was done with a dark brown on the rim and rings and black in the rusticated section...using Feibings Leather Dye. Followed by two coats of 100% pure Tung Oil, three days of drying and a final buff. No Carnuba yet. I'll let the oil dry for another month and then apply the wax with a soft wheel.
Did it turn out the way I wanted? Well, pretty much. Although the 'dripping wax' design doesn't really fit in an ideal way... it sort of works. And the rustication is by and large the way it was intended. So that's good...IMHO.
Note the pics below:
So I found another stem in my parts bin, but it was too large to fit the shank and not having a lathe I fudged up a way to run a piece of steel down the bore and set it up in my handy dandy DeWalt Compact LiIon drill...using that to turn the stem while I applied a variety of tools and gradually reduced the diameter to the point where it fit well. Thus, the stem issue was solved.
THEN - using my series of Iwasaki Japanese Carving files, and other files and papers, took the existing rustication down almost to a smooth surface and created a sort of 'dripping wax' look under the bottom-most ring, similar to what several of my favorite Italian makers offer...like Radice, for one. I love that look, and since I could do whatever I wanted...that's what I did! Then I went at the body of the strummel with one of my carving tools, a small narrow gouge, creating a surface covered with small deeply incised/indented shapes and finished with a very very fine 'parting' tool to score each of the indents with a series of fine lines, rather like hatchmarks...orienting these at 30, 60 and 90 degrees to each other as I worked along the surface of the strummel. The resulting effect can be seen in the following photos, which also show the original surface and the stage at which I had taken the surface down just prior to rusticating it.
The re-staining was done with a dark brown on the rim and rings and black in the rusticated section...using Feibings Leather Dye. Followed by two coats of 100% pure Tung Oil, three days of drying and a final buff. No Carnuba yet. I'll let the oil dry for another month and then apply the wax with a soft wheel.
Did it turn out the way I wanted? Well, pretty much. Although the 'dripping wax' design doesn't really fit in an ideal way... it sort of works. And the rustication is by and large the way it was intended. So that's good...IMHO.
Note the pics below:
")