Growley
Well-known member
- Joined
- Apr 10, 2012
- Messages
- 1,052
- Reaction score
- 0
Hey Brothers, and Sisters.
Several days ago I got a very unique commission request. Our brother peckinpahhombre requested that I make him a Poker....ANY Poker. He had absolutely no requirements on the pipe whatsoever, no preferences, no suggestions. He just gave me free reign ....with one stipulation :suspect: , that I photo document the process so he could see how it was made, AND share it with you guys, so you could see too.
So, at peckinpahhombre's request, here is the "How it was made" post for his brand new Growley Poker. I have to admit, taking pictures is actually kind of a hard thing to do when you're in the zone. It's easy to breeze through steps without snapping a shot or two. But, I think with the plethora of pictures to follow, there was little I forgot to snap.
I hope enjoy!
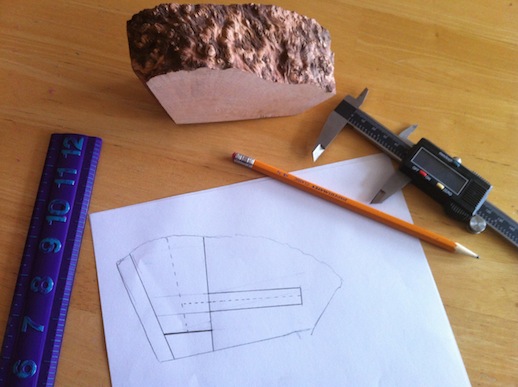
On a new design, I always start with research. I look at tons and tons of pictures of pipes to get as many good shapes in my head as possible. Then, I start sketching, until I come up with the pipe I want to build. Once I've sketched the pipe, I choose the perfect block to fit the bill. In this case, I wanted to leave natural plateaux on top and watch the straight grain flow from top to bottom, and all the way around.
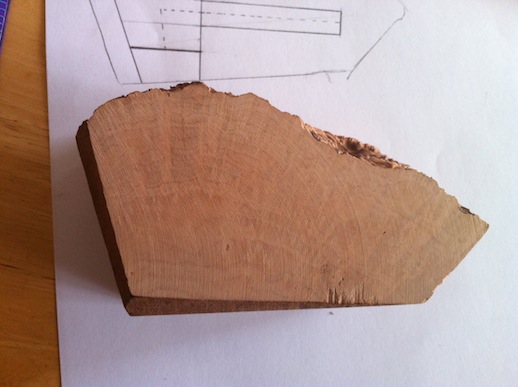
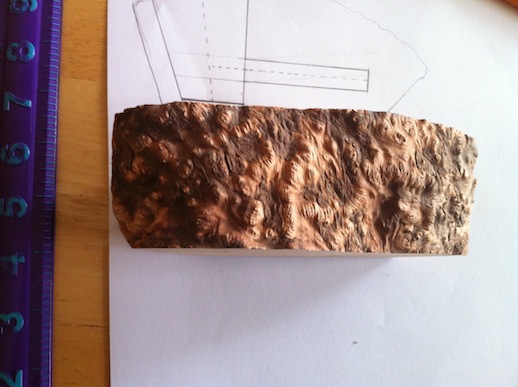
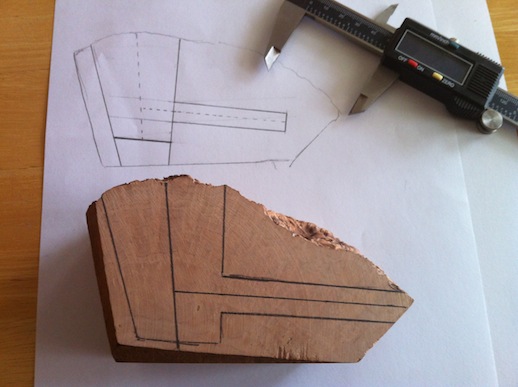
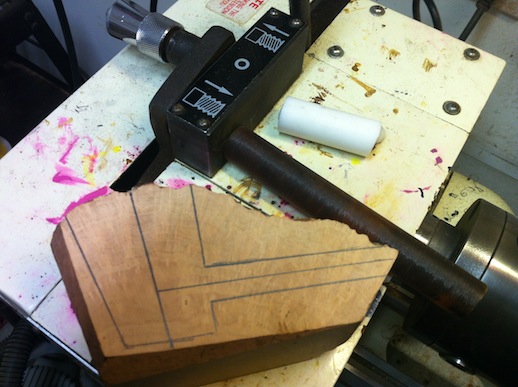
Once I find the right block, I transfer the pipe drawing onto it to make sure it will work out exactly the way I want it to. To do this right, you actually kind of have to look into the block, imagine the pipe sitting inside it.
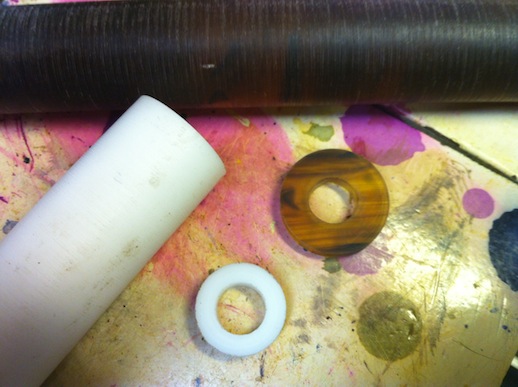
Now I choose the stem materials. For this pipe, knowing it was going to have a long shank, I wanted to give it some flair at the end with an Acrylic Amber stem and a white accent ring. Here are the stem materials before they're cut into anything recognizable...
I pre-cut and drill the accent and cap ring to the desired diameters.
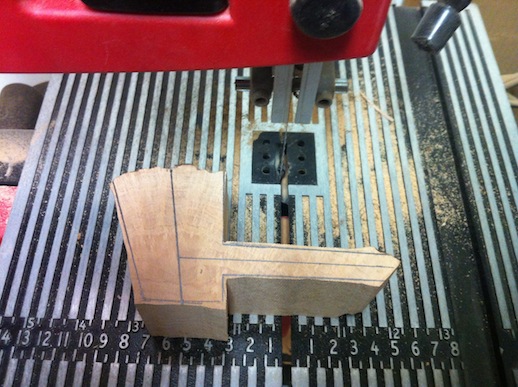
Now back to the block. Here, I cut it out on my band saw which gives me a reference for building the entire pipe. Not every pipe maker follows this approach as there are many, many ways to make a pipe. But, this way seems to work well for me.
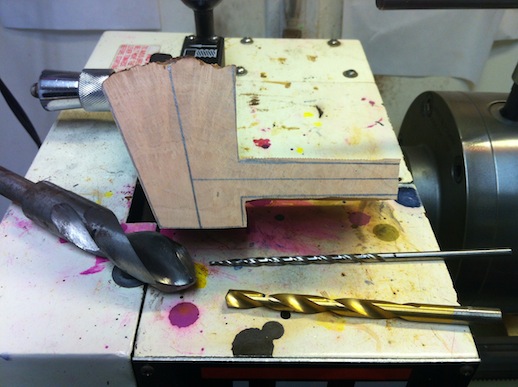
After it's cut out, I choose my drill bits (Chamber bit, mortise bit, and smoke hole bit) and mark them out to the desired drill lengths. PS. No that's not blood, it's red stain.
As with any project, prep work is important. Now that it's done, it's time to make that lathe work.
Here I'm drilling the mortise and smoke hole.
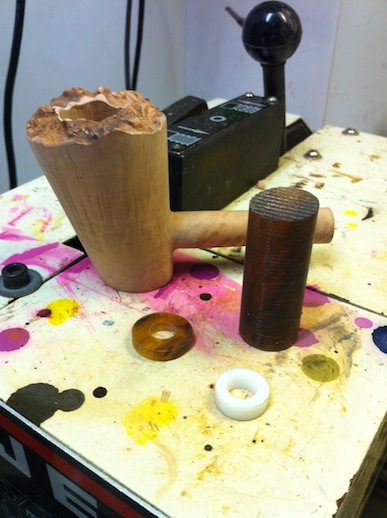
Now that my holes are drilled to length, It's time to turn down the shank.
After completing the shank and mortise, it's time to flip the block around and drill out the tobacco chamber.
At this point, I've done about all that I can do on the lathe. Once I've made sure I'm absolutely done with it, I can remove it from the lathe and start working the shape on other various sanders. It's important to make your list and check it twice here, because it's almost impossible to get the pipe back on the lathe in the exact same way if need be. So now, I remove it and begin shaping on the disc sander.
With my rough shaping done, it's time to move on to hand sanding. Here's where I do my final tweaks to the shape. In this particular picture, I'm removing the bark off of the plateaux. There are lots of ways to do this, but for me, for now, I use a pic.
Since I don't use pre fabricated stems, it's time to start creating the stem from scratch.
On my lathe I turn the stem down to fit the rings, and turn it again to cut the tennon to the exact right size to fit snuggly in the mortise.
From there I rough shape the stem with files and sand paper.
Once the stem is shaped and opened up properly, I stain the pipe and buff it.
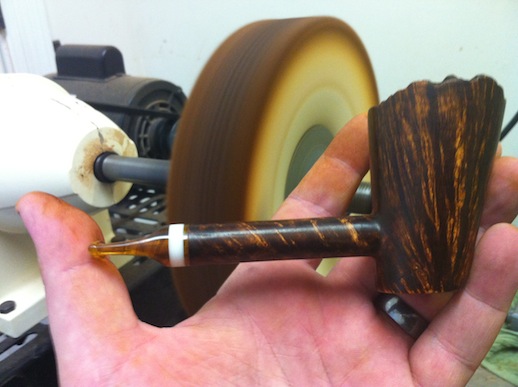
...and buff it some more..
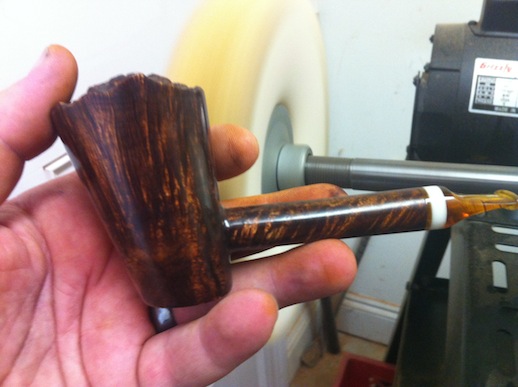
and buff it some more...
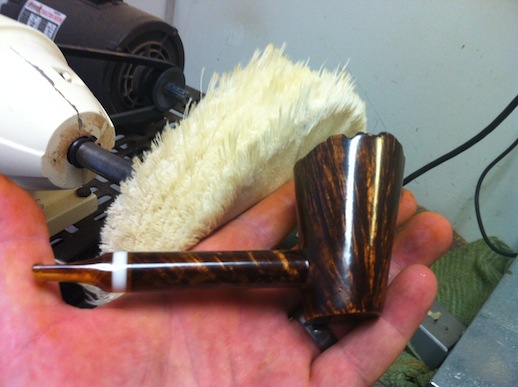
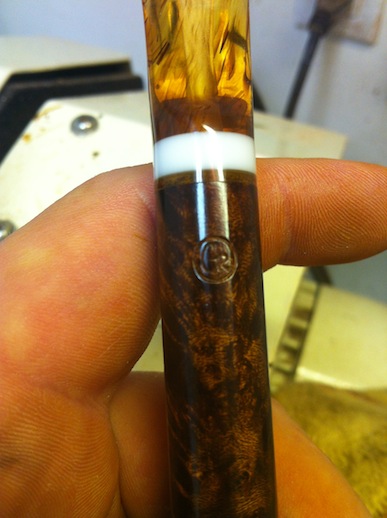
...and with the final buff and wax, she's finally ready for inspection and the Growley stamp of approval.
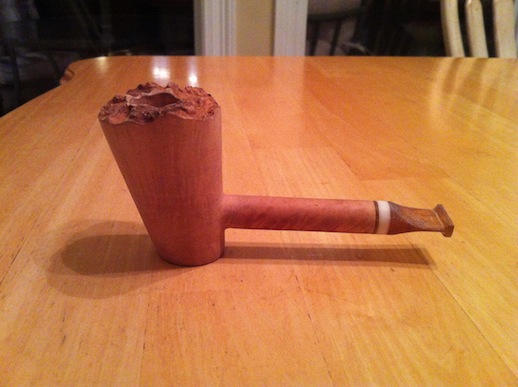
Final product:
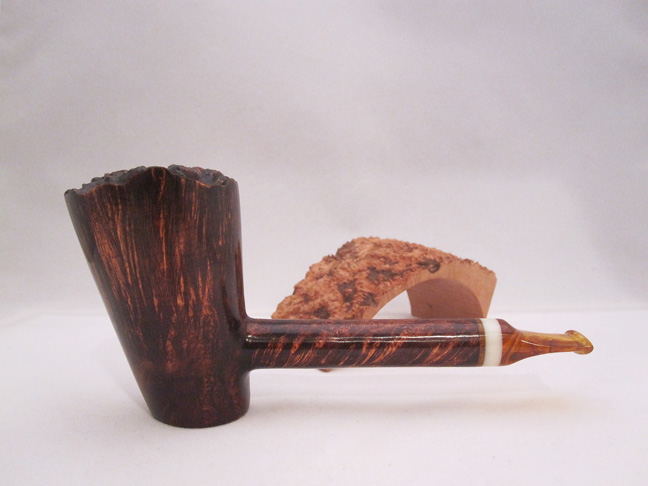
You can see more pictures on my SITE!
To give you a bit more insite on "how it was made", this pipe ended up taking me about 10 hours of solid work, in which I used about $4,500 worth of tools. If it were blasted it would have taken about 11 hours total, and use of another $2,500 worth of tools.
I hope you enjoyed looking through this, and I hope Dean enjoyes his new pipe!
Brian.
Several days ago I got a very unique commission request. Our brother peckinpahhombre requested that I make him a Poker....ANY Poker. He had absolutely no requirements on the pipe whatsoever, no preferences, no suggestions. He just gave me free reign
....with one stipulation :suspect: , that I photo document the process so he could see how it was made, AND share it with you guys, so you could see too. So, at peckinpahhombre's request, here is the "How it was made" post for his brand new Growley Poker. I have to admit, taking pictures is actually kind of a hard thing to do when you're in the zone. It's easy to breeze through steps without snapping a shot or two. But, I think with the plethora of pictures to follow, there was little I forgot to snap.
I hope enjoy!
On a new design, I always start with research. I look at tons and tons of pictures of pipes to get as many good shapes in my head as possible. Then, I start sketching, until I come up with the pipe I want to build. Once I've sketched the pipe, I choose the perfect block to fit the bill. In this case, I wanted to leave natural plateaux on top and watch the straight grain flow from top to bottom, and all the way around.
Once I find the right block, I transfer the pipe drawing onto it to make sure it will work out exactly the way I want it to. To do this right, you actually kind of have to look into the block, imagine the pipe sitting inside it.
Now I choose the stem materials. For this pipe, knowing it was going to have a long shank, I wanted to give it some flair at the end with an Acrylic Amber stem and a white accent ring. Here are the stem materials before they're cut into anything recognizable...
I pre-cut and drill the accent and cap ring to the desired diameters.
Now back to the block. Here, I cut it out on my band saw which gives me a reference for building the entire pipe. Not every pipe maker follows this approach as there are many, many ways to make a pipe. But, this way seems to work well for me.
After it's cut out, I choose my drill bits (Chamber bit, mortise bit, and smoke hole bit) and mark them out to the desired drill lengths. PS. No that's not blood, it's red stain.
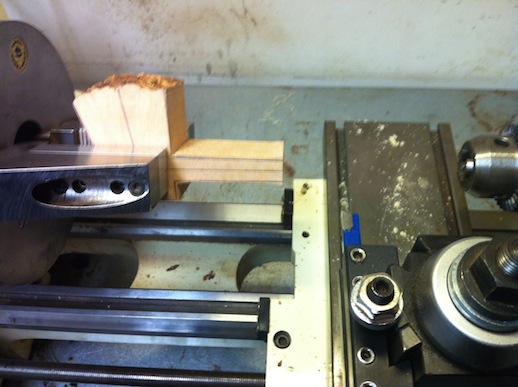
As with any project, prep work is important. Now that it's done, it's time to make that lathe work.
Here I'm drilling the mortise and smoke hole.
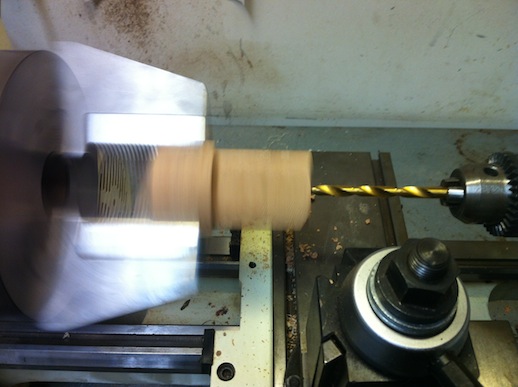
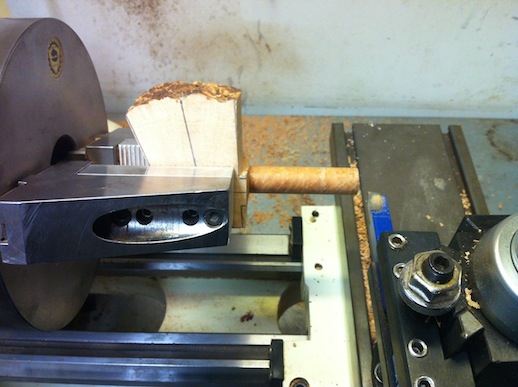
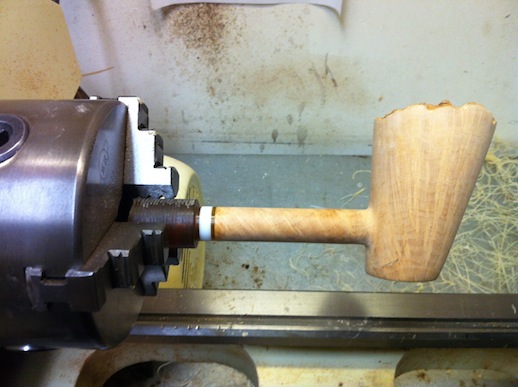
Now that my holes are drilled to length, It's time to turn down the shank.
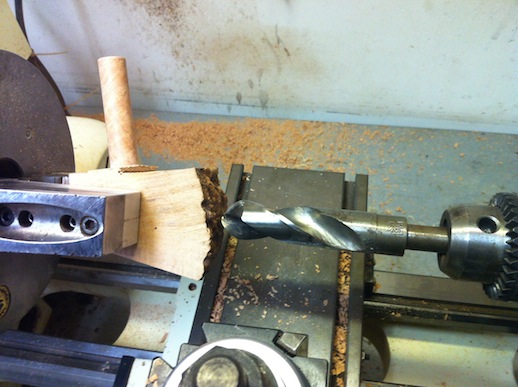
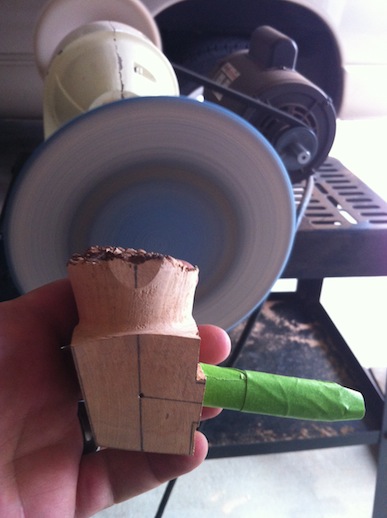
After completing the shank and mortise, it's time to flip the block around and drill out the tobacco chamber.
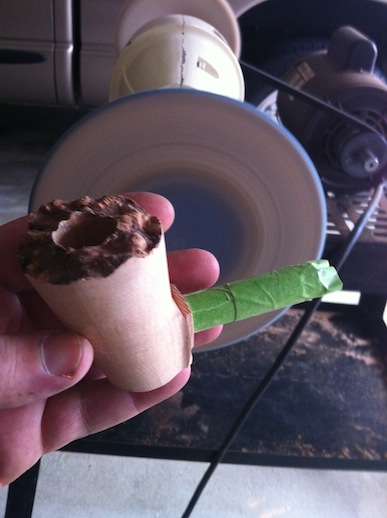
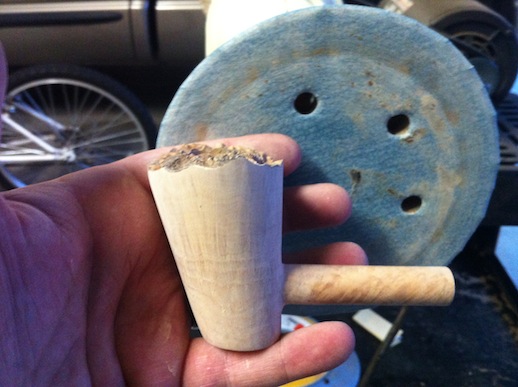
At this point, I've done about all that I can do on the lathe. Once I've made sure I'm absolutely done with it, I can remove it from the lathe and start working the shape on other various sanders. It's important to make your list and check it twice here, because it's almost impossible to get the pipe back on the lathe in the exact same way if need be. So now, I remove it and begin shaping on the disc sander.
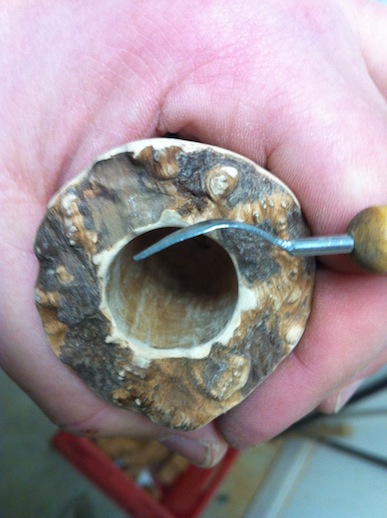
With my rough shaping done, it's time to move on to hand sanding. Here's where I do my final tweaks to the shape. In this particular picture, I'm removing the bark off of the plateaux. There are lots of ways to do this, but for me, for now, I use a pic.
Since I don't use pre fabricated stems, it's time to start creating the stem from scratch.
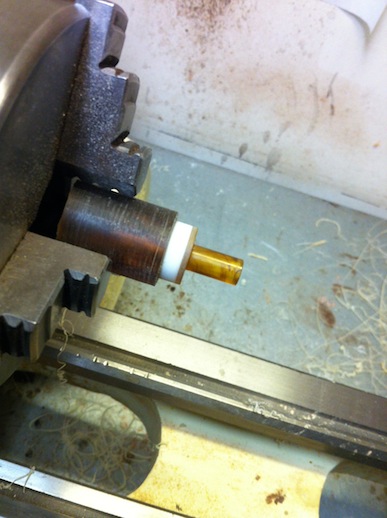
On my lathe I turn the stem down to fit the rings, and turn it again to cut the tennon to the exact right size to fit snuggly in the mortise.
From there I rough shape the stem with files and sand paper.
Once the stem is shaped and opened up properly, I stain the pipe and buff it.
...and buff it some more..
and buff it some more...
...and with the final buff and wax, she's finally ready for inspection and the Growley stamp of approval.
Final product:
You can see more pictures on my SITE!
To give you a bit more insite on "how it was made", this pipe ended up taking me about 10 hours of solid work, in which I used about $4,500 worth of tools. If it were blasted it would have taken about 11 hours total, and use of another $2,500 worth of tools.
I hope you enjoyed looking through this, and I hope Dean enjoyes his new pipe!
Brian.