My first pipe....A weekend DIY project

Brothers of Briar

Help Support Brothers of Briar:

This site may earn a commission from merchant affiliate links, including eBay, Amazon, and others.

Stackle2

Well-known member
Joined
Nov 3, 2011
Messages
130
Reaction score
0
I finished the work week fairly bummed out, I've been putting in about 14 hours a day, & this morning my Doc diagnosed me with degenerative disc disease. I really just wanted to crawl in bed with a bottle of whiskey & make the day go away. My wife saw how down I was, so when I got home from work, & she had the pipe carving kit sitting out on the kitchen counter, along with a shiny new coping saw, a few different wood rasps, and a nice dewalt orbital sander. She really is an amazing woman. Anyway, I have been putting off the pipe making project until I had assembled all the proper tools to do the job, but since she had surprisingly purchased the last few things I needed, I got right to it.

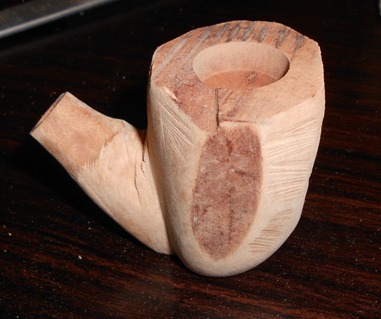
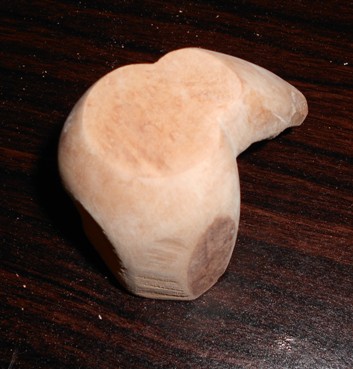
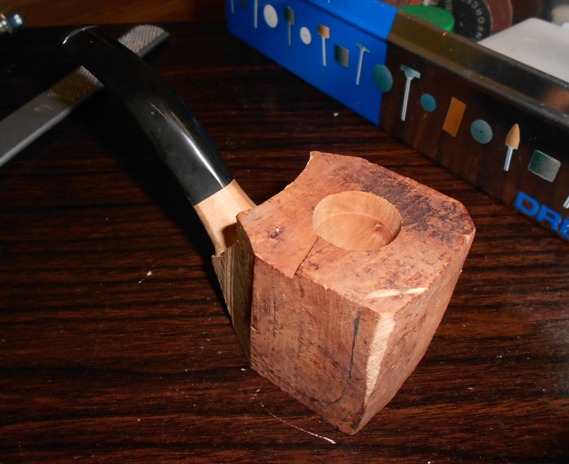
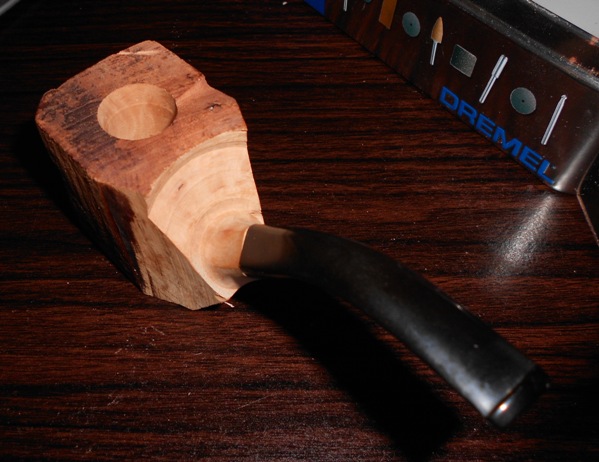
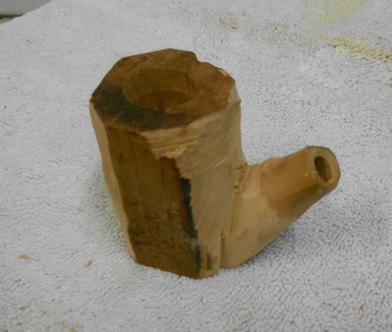
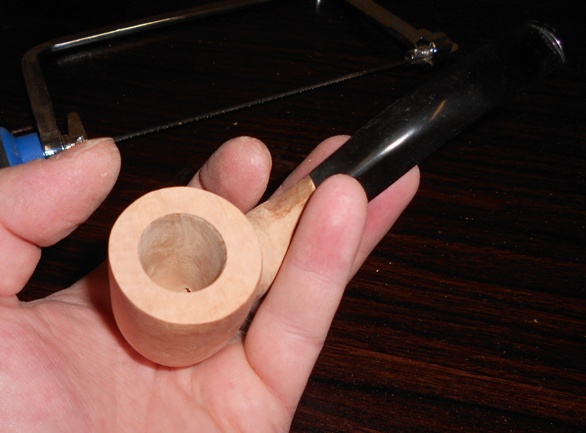
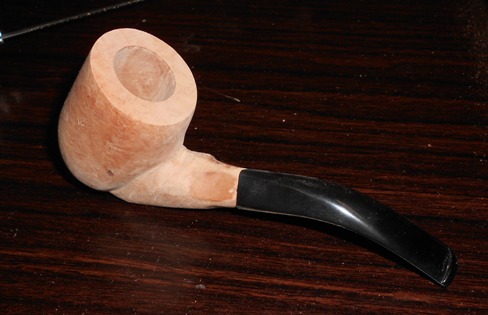
Here is the initial block & stem along with the tools I planned to use:


I am going to post my progress as the project progresses.
 
Here I have roughed in the basic shape with the coping saw:


I have never tried to carve a pipe before, & I welcome any suggestions or comments. I don't expect that this pipe will look very nice at all, seeing as I have no clue what I am doing. Kyle's recent adventures in pipe carving piqued my interest, & 2 hours into the project, I really am enjoying myself immensely. If you've never tried to carve your own pipe, it is extremely inexpensive to get into. I believe the kit the wife purchased for me ran around $25, & the tools that she purchased cost another $25.
 
Man, you weren't kidding about posting progress. This is practically real-time! :D Your wife sounds like quite a lady, bro. Good luck with that project.
 
Shooting for a sitter? I hope so. It looks like it's gonna be killer! I look forward to seeing it complete. :D

If I were going to give any advice (from one novice to another) it'd be to take your time and don't stop until it's the best you're willing to accept.
 
Here I've put the wood rasps to use, further roughing in the general shape, & smoothing out the rough edges left by the coping saw:


In case any of you were curious as to what my goals were for pipe style, I really haven't chosen one, I am just going to try to see where the wood takes me. I imagine I am going to stay fairly conservative though, as I am not the artistic type at all. On a side note, the briar has a nice sized crack halfway down the bowl, so I am going to have to work around that.
 
George Kaplan":mqe0fzse said:
Man, you weren't kidding about posting progress. This is practically real-time! :D Your wife sounds like quite a lady, bro. Good luck with that project.
Lol, yeah, its just about realtime. I had taken pictures of the first 3 steps before I decided to take a smoke break & get some lunch. Figured its a good time to post my progress & see what everyone thought. I'll keep the updates up every hour or two.
 
Stackle2":hyy2801s said:
George Kaplan":hyy2801s said:
Man, you weren't kidding about posting progress. This is practically real-time! :D Your wife sounds like quite a lady, bro. Good luck with that project.
Lol, yeah, its just about realtime. I had taken pictures of the first 3 steps before I decided to take a smoke break & get some lunch. Figured its a good time to post my progress & see what everyone thought. I'll keep the updates up every hour or two.
You're makin' me itchy. I wish I were at home so I could get to work on my pipe. Race ya! :bball:

Kidding! Take your time removing all the wood that isn't the pipe. Lord knows I do. :p
 
I made a little more progress before closing down the pipe shop for the night. I have already noticed several mistakes I made, although I believe that I'll be able to repair them enough for the pipe to be servicable. On a side note, while the draft hole was perfectly positioned in the middle-bottom of the bowl, where it meets the shank it is about 3 millimeters off, so the stem actually blocks the hole. Anyway, it was drilled high, so I drilled another hole, with a larger bit & only about a quarter of an inch deep. This turned my project pipe into a system pipe! It draws well now too, really tempted to smoke it tonight, I really want to see if the moisture sump works.

Here is the pipe after more material removal with the rasp, & a LOT of sanding with 80 grit (The grain is starting to be apparent, it is mostly birdseye, with some nice deep grain patterns):


So It has turned into more of a leaner than a sitter. I am going to take a lot of material off them stem though, so it might sit by the time I get done:


I know its rough, I am definately my worst critic. I am happy with how its turning out considering its my first try at carving, plus its a lot of fun. I've been so excited all evening, rushing into the house to show the wife the latest progress. She is an angel, she is acting so interested in every little thing I show her...lol.

Any suggestions as to a finish? I have heard that leather stain is ideal, but I don't know if I will be able to find that in my town. Are there any other types of stain that work well on pipes? I am definately not going to use varnish, just going to use wax to seal it.
 
"A little progress"? For a first try, that looks like a new land speed record to me! Excellent work.
 
Thanks for the kind words guys!

I think that if I had a table-mount belt sander, I'd be able to remove a lot more material in a much more rapid manner while still keeping good control of the pipe. Probably would be a lot easier (& safer) than using the orbital sander like I was today. lol, I let the sander get away from me, & it didn't take 2 seconds for it to chew through my pants.
 
You have a fantastic wife. Sorry about the degenerative disc disease.

BTW - for your first go around with carving she is looking awesome! :cheers:
 
Stackle2":l2nwgv6a said:
Thanks for the kind words guys!

I think that if I had a table-mount belt sander, I'd be able to remove a lot more material in a much more rapid manner while still keeping good control of the pipe. Probably would be a lot easier (& safer) than using the orbital sander like I was today. lol, I let the sander get away from me, & it didn't take 2 seconds for it to chew through my pants.
Yikes! Glad that wasn't your leg. Sheesh!

BTW, the pipe is lookin' good. I'm excited to see the next update!
 
Holy crap, Stack, I go to work for a few days, and look what you're up to!

I can't wait to see the finished product!
 
Harlock999":ijk0jex6 said:
I'm liking it!
Is that a triangular stem?
Right now them stem is diamond shaped, but I think I'm going to shape it into an inverted teardrop, haven't seen that done before, so should prove interesting.
 
Stackle2":6ct8xo79 said:
Harlock999":6ct8xo79 said:
I'm liking it!
Is that a triangular stem?
Right now them stem is diamond shaped, but I think I'm going to shape it into an inverted teardrop, haven't seen that done before, so should prove interesting.
Be careful with a design like that. The less equally-distributed material, the more likely a tight fit will cause undue stress when the stem is removed--I'd hate for you to hear a snap or a crack and shout "OH F__K!" 8)
 
Yeah, I hear you kyle. At the point I am at right now, I am just going slowly with some 120 grit on a dremel grinding disk, just removing miniscule amounts of material at a time, that way I can judge the strength & integrity of the wood carefully as I go.
 
Well, I got some more basic shaping done. I thinned down the walls so its not so husky, & I began refining the shape of the shank. This pipe kit came with rather thin shank walls in my opinion, so now I don't have very much faith in its strength. I want to do something to build up the thickness of the shank. I have a lot of experience with fiberglass & other resins, so I considered using a colored resin to make a swirl pattern, kind of like cumberland, to thicken up the shank. Then I could machine it down to the stem shape. But that got me thinking about the manufacturers that use horn & antler & such to place rings on the shank. I have been stockpiling old antler for Tapien, so I have a lot of it laying around my garage. I am going to attempt to add a ring of antler, & then resin it in place. I think I am going to shape it so that it kind of bulges out, think old 1800's crown molding. I am not really for sure how the experts go about doing this. I am going to do some research online, but I think its the way to go. I really want this to be one of the formost pipes in my rotation, not really willing to chalk this one up as a mistake & toss it because of the shank.

Let me know what you guys think. If any of you have experience working with antler, I would greatly appreciate your suggestions regarding placement & how to secure it to the pipe.
 
Just wanted to pop in and say two things:

#1 Sorry to hear about the back troubles. That's terrible.

#2 Your pipe is looking great! For not being artistic, you've done a wonderful job so far!
 
Top