Refurbishing estate pipes

Brothers of Briar

Help Support Brothers of Briar:

This site may earn a commission from merchant affiliate links, including eBay, Amazon, and others.

MartinH

Well-known member
Joined
Jan 4, 2011
Messages
658
Reaction score
0
I'd like some advice and guidance on fixing up estate pipes. I've read several web sites and wonder if this something I can learn over time or if this isn't for the faint of heart?

I'd love to enrich the smoking hobby by fixing them up and maybe even carving my own some day. I'd love some advice from the group is possible.

Thanks in advance,

Martin
 
Just poke around the boards and you´ll find lots of stuff in the topic. Also on you tube there are many step by step videos on cleaning stems, sterilizing bowls, reaming etc.

Just do it is my motto. I´ve elearned by doing it and asking for help along the way. I just reccomend starting on a more modest pipe rather than your estate Eltang....

:lol:
 
MisterE":lwjeplvi said:
Just poke around the boards and you´ll find lots of stuff in the topic. Also on you tube there are many step by step videos on cleaning stems, sterilizing bowls, reaming etc.

Just do it is my motto. I´ve elearned by doing it and asking for help along the way. I just reccomend starting on a more modest pipe rather than your estate Eltang....

:lol:
:cheers:
 
Ahh, nothing like bringing an old pipe back to life. Like was said before, search the site, watch some youtube videos and just give it a shot...It's not as hard as it looks, and that first bowl once your done is always exciting :D
 
I just finnished with the first of 2 kaywoodies estates i bought. I took my time in doing it made sure i had the proper items..sandpaper..polish etc. The pipes i bought were in storage from the early 50's...it was not easy cleaning(scrubbing) the shank , or the stinger. I took it one step at a time and i have to say for the investment it was worth it.
 
any opinions on using linseed oil? nice luster? don't like the odor, so I was also wondering how long it would require for it to disappear.
 
Zeno Marx":31821v4t said:
any opinions on using linseed oil? nice luster? don't like the odor, so I was also wondering how long it would require for it to disappear.
I would say. it's your pipe,you can use anything you want. Carnuba wax is generally recommended because it won't hurt the pipe or you. I would be inclined to stich with the status quo, rather that re-invent the wheel, so to speak.
 
I didn't like the wax idea because it is a rustic pipe with lots and lots of tiny, tiny pits and grooves. lots of places I won't be able to remove the wax. maybe with a toothbrush, but I wasn't sure if I'd end up with a brown shiny pipe with whitish wax specks all over the place.
 
An article I recently read, wax is used on smooth finished pipes and a "varnish" on rustic ones, I was researching refinishing pipes sorry I didn't save the article link.

Now I used the word "varnish" in a generic sense be the actual finish a varnish, shellac, lacquer, or urethane,

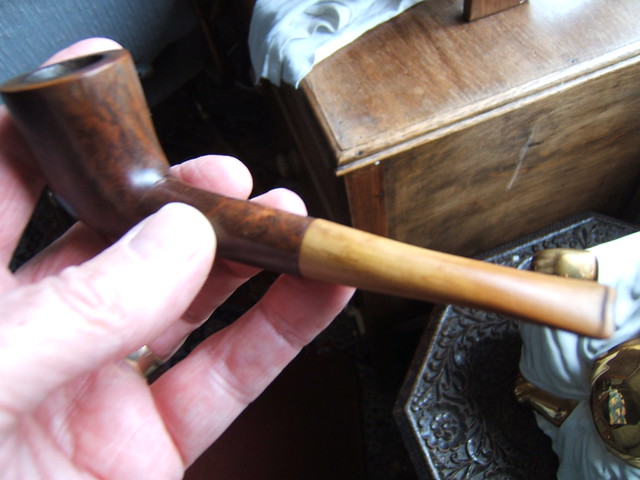
The reason I was doing research is because some rustic textured pipes I was working on. I was getting a bad end result when trying to strictly use wax as suggested,

In my woodworking experience and knowledge of finishes and solvents, I am going to say some pipes were finished using "Shellac" this derived from the fact I was able to remove the finish of the pipes I was working on with 0000 steel wool and denatured alcohol, as in shellac is alcohol soluble

Shellac is non-toxic when dry, often used on food related wooden items and children toys.

Also common wood stains will not do well on refinished pipes, it is suggested an alcohol based stain be used, not easily to come by, it was recommended use leather shoe dye which is basically an alcohol based stain. (Dye not shoe polish)

Common stain you buy for other common woodwork is oil or mineral spirit based, it will soak into the briar and may leave residue which may re-surface when smoking the pipe. alcohol based stain will not, the alcohol carrying agent will help apply the pigment and "flash" completely leaving no oil residue.
 

pipe estate by velocipede228822, on Flickr

This is the result of cleaning up an estate pipe had on ebay. I cleaned it up with "Clean and Cure" first , running a pipe cleaner dipped in it through the stem and shank, and then the bowl, and then poaring a little into the bowl, after a few seconds ran it out through the shank, and then cleaned out the bowl with a doubled pipe cleaner.
Then after leavng it for 24 hours, I washed the separated parts in a bowl of very hot soapy water, and let them soak a while.
Then after cleaning the stem and bowl with pipe cleaner and paper roll. I put the stem and bowl in to an Ultrasonic cleaner and left it for about an hour.
I then rubbed the dried pipe over with a hard peice of Bees wax, and buffed it by hand.
I don't have buffer yet for my drill, but it is now bad for hand cleaning and polishing.
 
Not sure if my method of staining cedar arrows will work with pipes, but you might give it a try on a pipe you don't have much invested in.

I use mason jars, and mix Rit dye powder with denatured alcohol. The percentage of each is not critical. Expect some of the powder to settle in the bottom of your container, but again not a critical issue. You can use the Rit color dye chart to mix an endless array of colors. Here's the link-

http://www.ritdye.com/colorit_color_formula_guide
 
Martin -- To get that fantastic black, like-new shine on vulcanite stems, I would recommend thinking about a buffing wheel. The hand method just won't do it on some pipe stems. I don't have a wheel yet, but I'm looking into getting one in the next 6 months or so.

I have used leather dye on one pipe. The quick lesson I learned was to (next time) dilute the dye by at least half, as it can "color" the briar darker than intended. I used Fiebing's "light brown" and that was a mite too dark for this particular pipe. Looked better than when I started, though.
 
I have restored a great number of vulcanite pipe stems and have found that the most effective and most controllable method is using sandpaper. Mr. Clean sponges don't cut fast enough, and a wheel with rouge tends to round over the sharp edges especially at the stem-shank joint and around the bit area. I start with 320 sandpaper, then quickly move on to 600, 800, 1000 and eventually 1500 or 1600 grit which will bring up a nice satin shine. These are all wet-type automotive papers and I keep them wet and clean. You can use olive oil for the last grits which will help with the polishing and seal the vulcanite to protect it from future oxidation. Using this method you can quickly remove the green oxidation and with a bit of work most tooth marks can be sanded out as well, reshape the bit, etc.

Also, vulcanite responds well to removing tooth marks by repeated heating in boiling water. Over time the indentations will expand and almost disappear, sometimes to the point where little to no sanding is required depending on how fussy you are. Be careful, vulcanite gets soft and is easily bent or deformed when heated like this.
 
Good to know about the sandpaper method. I have not tried that.

I do have one question about oxidation. When oxidation is VERY GENTLY scraped or sanded off vulcanite stems, are you actually removing some of the original vulcanite, or is oxidation a substance that is ON the vulcanite, but not "part" of the vulcanite? Hope I'm stating this question clearly.
 
I would have to say yes. Oxidation is the combination of the vulcanite rubber with atmospheric oxygen. When removed you are taking away a minute amount of the stem material. However, like anodizing on a piece of aluminum, I have always seen it as a very thin exterior coating rather than like rust on steel which continues to eat into the heart of the item. Sanding it off does little to remove any significant amount of material. For instance, after sanding I have never seen any damage to the maker's logo on a stem, but I have seen them completely removed in one buffing using rouge on a wheel.
 
Hunter5117 -- Thanks! Very interesting. I'm definitely picking up some very fine sandpaper this weekend.

One more question, just to be sure: When lightly sanding, did I understand you to say that you keep the stem and the sandpaper wet during this process, per the nature of how this specialized sandpaper was intended to be used?

Thanks again.
 
Two other simple methods - Toothpaste will actually work well as a stem polish in less-oxidized cases. Rub it on, rub it off. For tougher jobs, the metal polish called Flitz does a good job and leaves a black surface, though'll want to wash it with water after polishing. Bleach is a more extreme measure for badly oxidized stems. If you're compounding the stem, only compound it when it's inserted in the pipe or you risk rounding the edges where it meets the shank. Wrap some tape around the briar shank to protect it from the compounding and polish carefully.
 
I am also new to this, and picked up a few used pipes from Ebay.

Here is my supplies list after trial and error and why I chose them:

1. Cleaner - 151 Ever-clear
Regular 80 proof liquor did not work well, Isopropyl Alcohol left a ghost that I did not like, 190 proof Ever clear is not available.

2. Pipe Cleaners - I like the ream and clean that you get at Walgreen's, they are out $3 for 100. I do have some puffy ones too but that is mainly for my normal smoking or for really tight bits.

3. Bowl Treatment - I opted for Cotton Balls and 151 Everclear
I used salt once, and found it to be a pain in the butt. I also did not like hearing the stories of bowl cracking. I found the active carbon method OK, but not as good.

4. For heavily oxidated stems: 1 hour worth of bleaching works well. I then follow this up with 250, 500, then 1000 grit sandpaper.

5. Polishing: I use my drill with 3 polishing pads. The first is for Tripoli, the 2nd is for White Diamond, the 3rd is for Carnuba

6. Toothbrush. For general cleaning

I can speak about techniques I have used if you like.
 
I have used a toothbrush and toothpaste on a stem, and then let is soak in a cup of hot water with a denta tab, used for cleaning teeth. And it worked.
I have sent for a cleaning kit that comprises of an electric toothbrush with three detachable heads and jars of poishing compound,I'll let you know how it works out when it arrives. Got it on ebay.
 
Top